24 October 2011

Honey Hibiscus Wit

After reading over my last few entries before the huge gap, I realize I never gave a review of the Honey Hibiscus Wit, affectionately dubbed 'stinky pinky' by my friends (because of the color & aroma)...

It's unlike anything I've had before.  To recap, this one was brewed with a pound of honey, hibiscus flowers, coriander seed, and bitter orange peel.  I brought the first bottle out to try before the beer had a chance to mature.  Cracked it open, poured it into a few glasses, and was disappointed.  The taste wasn't that great, and the beer seemed over-carbonated.

Fast forward to a month later, when I sat staring at a case of this beer in my closet, wondering what I was going to do with it.  I cracked one open, just to give it a second chance, and promptly drank two of them.  The taste had changed completely.


It's a very light beer, that is translucent pink in color (the picture doesn't do it justice).  My friend summed it up best when he said, "I drank the first one, and spent the whole time trying to come up with what it tasted like.  Then I drank another one, and realized that it doesn't taste like anything I've had before."

14 October 2011

A short (or not) hiatus...

Haven't been blogging, but I have still been playing brewmaster.  I've tackled two recipes since the last update.  The first was a double chocolate strawberry stout, and the second was a pumpkin spice ale.

The stout was quite the endeavor if I'm honest.  And in case you're wondering, no, 5 gallons of beer, plus 6 pounds of reduced strawberries do not both fit in a 5 gallon carboy...  I still have strawberry residue on my kitchen ceiling to prove that point...

In all though, the stout was pretty straightforward, and a bit lengthy at 2 months from brewing to enjoying, but it was the first time we actually experimented with our own recipe.  The beer is very sweet, and definitely suited for dessert, but so are the chocolate covered strawberries we tried to mimic the taste of.  My hydrometer broke for this one, but we estimate that the beer came out to about 8% ABV, due to the considerable amount of sugar, and added alcohol from chocolate and vanilla extracts.

The pumpkin spice ale was another kit beer, but served the purpose of being a good seasonal, and relatively easy.  Due to the pumpkin shortage in our area, we used a fresh pumpkin instead of canned pumpkin puree, which will end up giving me a more authentic beer in my eyes.

It's currently carbing away in bottles, and at a typical 5.5% ABV, it will make a pretty good beer to enjoy as the Halloween decorations are slowly replaced by cornucopias and turkey dinners.

I purchased the BeerSmith software, to formulate my own recipes, and we'll be using it to design our next beer, which I believe will be an apple pie amber.  I'm interested to see what we end up with after this one...

Final stats for the pumpkin spice ale:

OG - 1.052
FG - 1.010
ABV - 5.502
IBUs - 10.63

31 May 2011

90 Minute: Bottled...

The 90 Minute found its way into bottles this weekend.  22 bottles to be exact.  We bottled it using 16 of our brand new 750mL champagne bottles, and a six-pack of 12oz bottles for either giving away, or drinking alone.


It was a pretty close match to the Dogfish Head 90 Minute that it was cloned after when sampling an uncarbonated sample of beer, and I'm happy for that.

Final stats for the IPA were:
O.G.   = 1.082
F.G.    = 1.021
%ABV = 7.991%

We also racked the honey hibiscus wit to secondary, and purchased most of the ingredients to make our next brew, chocolate covered strawberry stout.

04 May 2011

Jolly Scott's Jailbreak IPA

Sunday was brew day for the next beer, titled Jolly Scott's Jailbreak IPA (long story).  Continuously hopped for 90 minutes, with a mixture of warrior, amarillo, and simcoe hops, this one should be a very powerful beer.  A 9 pound bucket of extract, along with 2 additional pounds of extra pale extract, plus some steeping grains ensured that this one's going to have a lot of fermentable sugar in it.  To prepare for this high gravity beer (1.085 to be exact) I ordered an extra vial of yeast, to double the amount that I pitched, and also a "yeast fuel" pill sold by Austin Homebrew to make sure that fermentation would take off, and not stall.

Monday morning started off as well as I had hoped.  I had a blowoff tube affixed to the carboy, emptying into a 4 cup measuring cup, filled with water, to act as an airlock.  I knew fermentation was going to be particularly vigorous on this one, so I put the carboy and cup on my counter in the bathroom, and crossed my fingers.  At 7 am, only 12 hours after pitching, there were already bubbles coming out of the tube in a fairly constant stream.  I was pleased, and it seemed that fermentation was well underway.

Imagine my surprise when I came home from work on Monday, to have this sight greet me...


The beer had foamed everywhere...  The measuring cup looked like a giant foamy muffin, and my entire counter was coated with a thin layer of watery beer.  The cat had gotten into the spilled beer, and needless to say, I had some additional messes to clean up as a result of that...

I have more hops that I'll be using to dry-hop the beer after it's racked to secondary, so judging with how quickly fermentation has started, I would imagine that Sunday will be the day to do that, a week after brewing.

15 April 2011

Big Update

Time has flown by since the last update, and I'm well overdue.  A few things have happened since the last post.

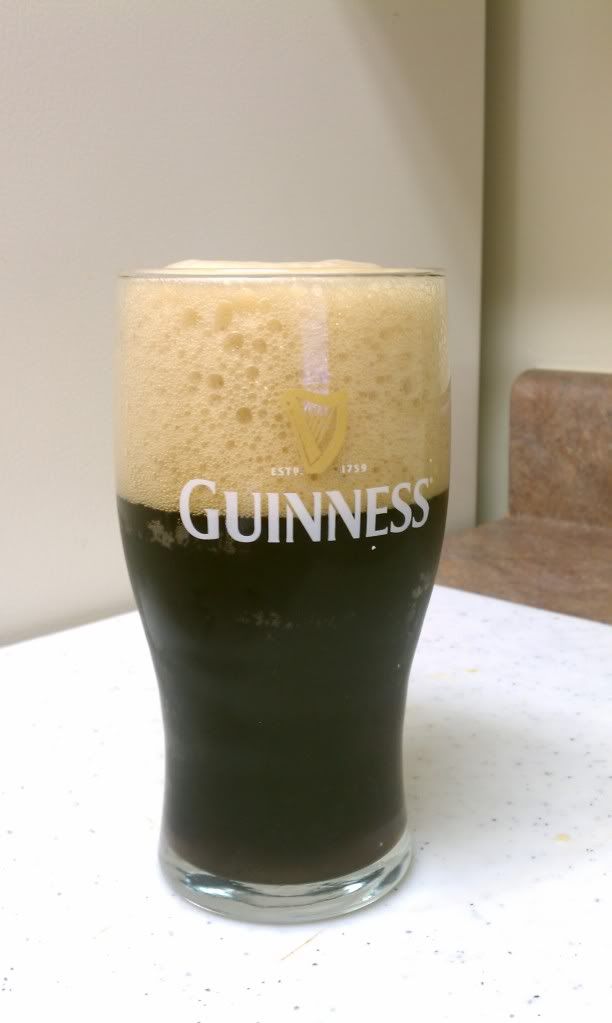
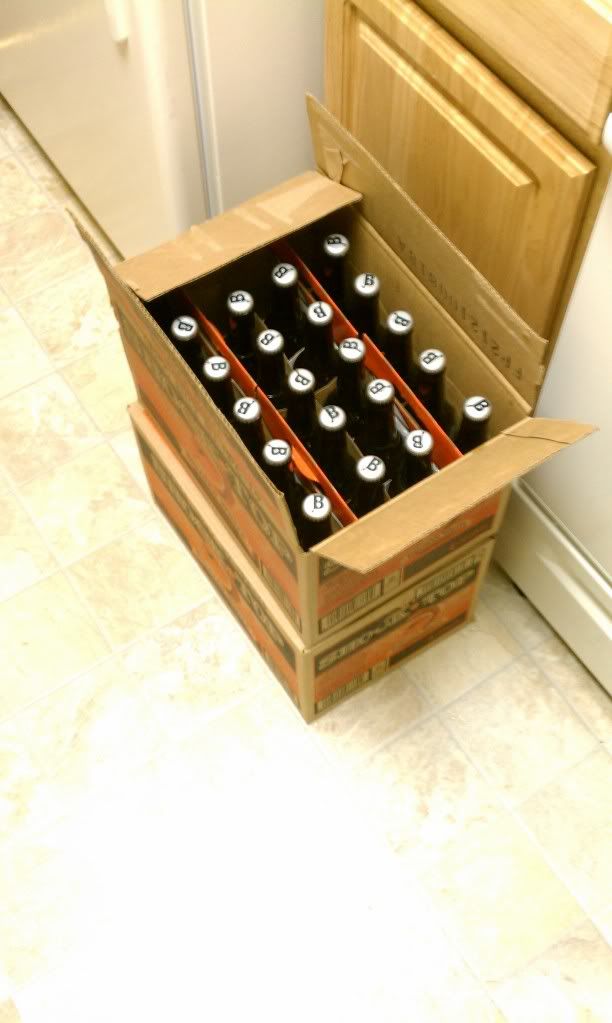
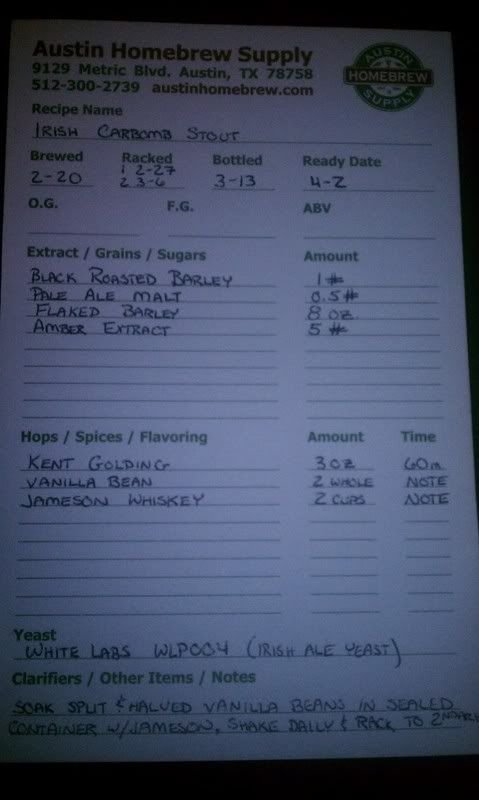
1)  Carbomb stout has carbed, and it is glorious...  I've given a few bottles out to beer drinkers with different tastes, and feedback has been overwhelmingly good.  Personally, I think I could do better, but I suppose that's why 'they' say that you're your own harshest critic.  I drank my first bottle of it, looking for the carbomb taste, which I can best describe from memory as a solid stout taste, with a vanilla taste, followed by a chocolate milk aftertaste, and a background hint of the whiskey.  What I experienced was a very good Irish stout, with a subtle hint of something at the end of the taste.  I knew what it was, so I was able to recognize it pretty instantly as the whiskey, but other tasters that I've talked to have told me that if they hadn't known it was whiskey, they wouldn't have been able to place it, but they all could taste 'something else' in there.  I've only had 2 additional people taste the beer, and each one has asked for some of it, if I ever brew it again.  So that's something...

I tried a second bottle, knowing that I wasn't going to get the taste I was looking for, but instead, to just taste the beer, and see if it's good.  It is.  It is very good.  I'm very happy with it, and I'm looking forward to brewing it again.

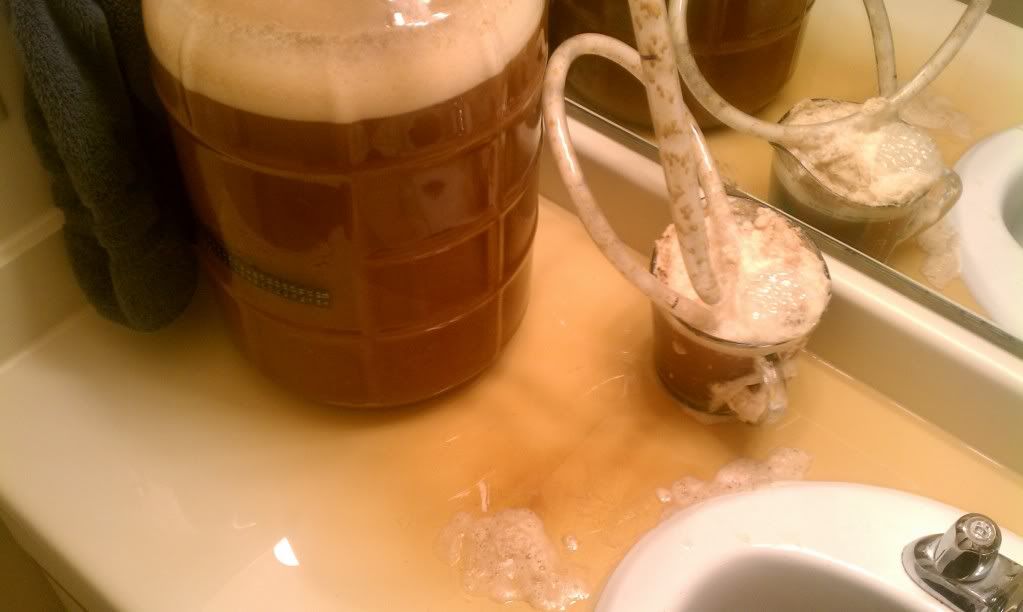
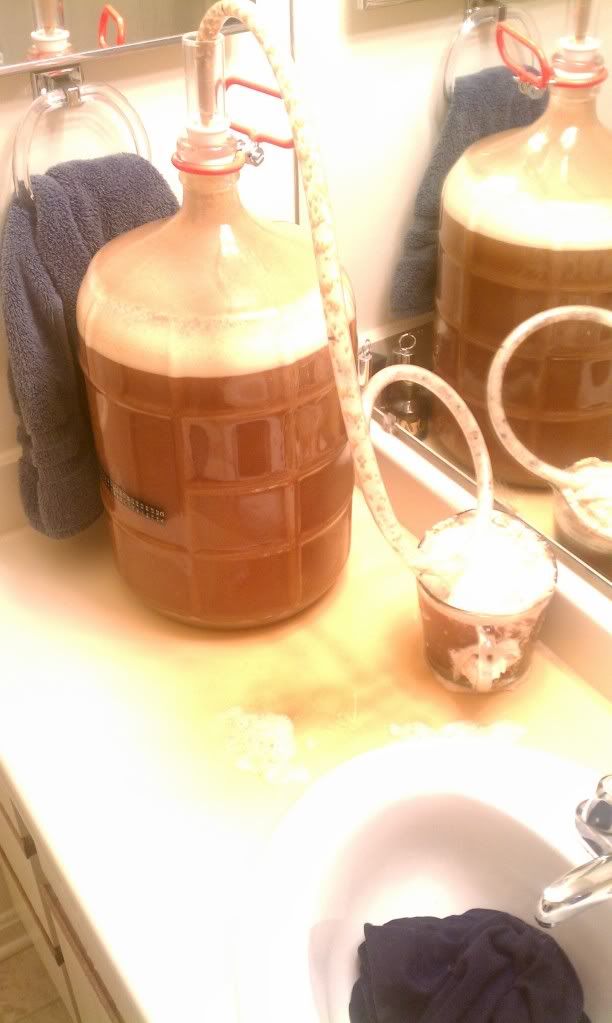
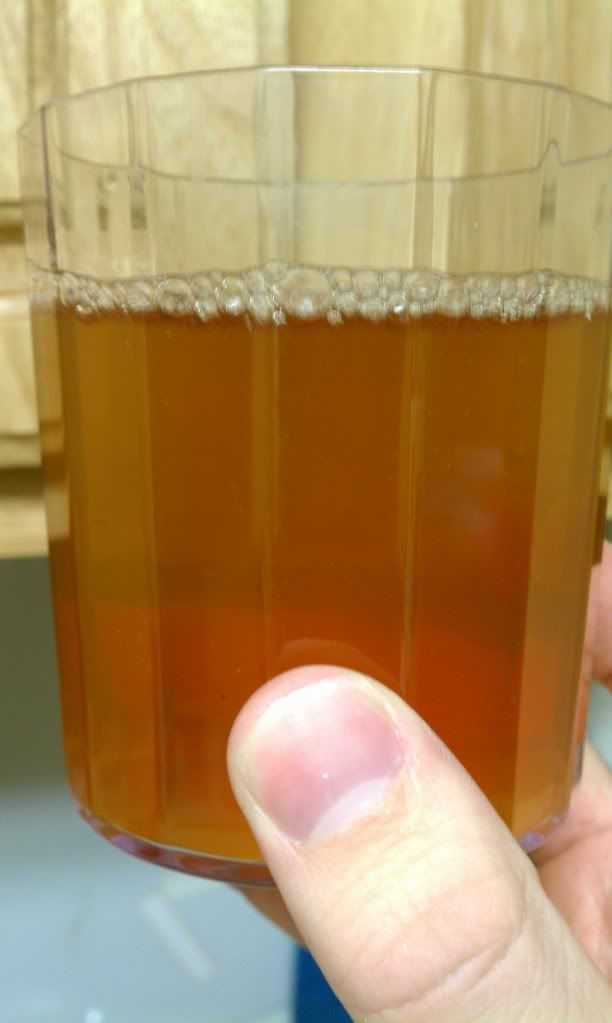
(Not the greatest pour...)

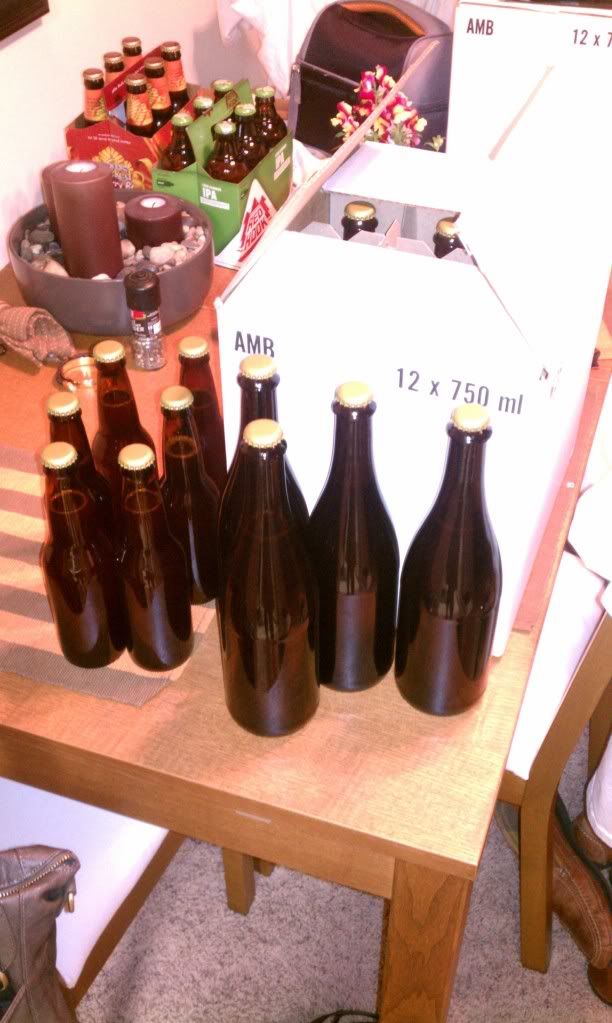
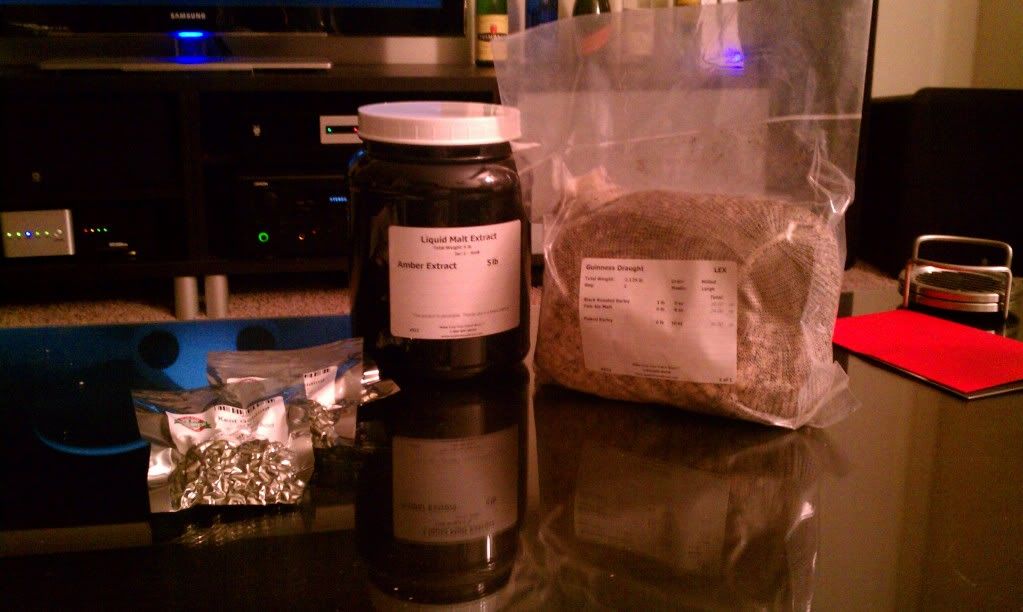
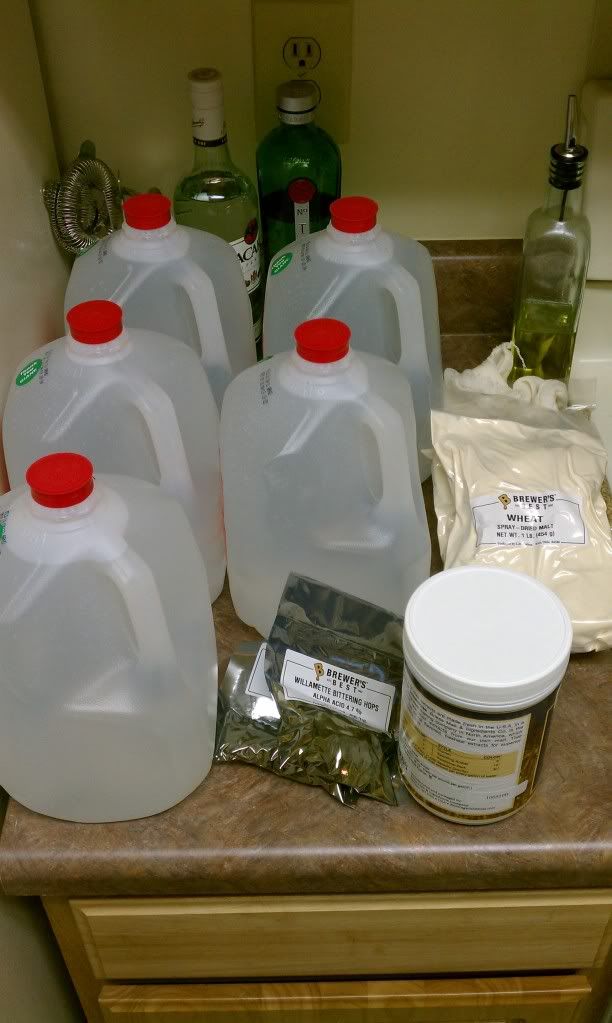
2)  I'm expanding.  My two brewing friends and I are pitching in together to buy more equipment and recipes, and our first order is on the way.  We are getting 2 additional 5 gallon carboys, expanding fermenting capacity to 20 gallons at a time, as well as two new recipes to fill them with.

The first recipe is a honey-hibiscus wit, which sounds pretty tasty as a Spring seasonal.  The second, which I'm a little intimidated by, but looking forward to at the same time, is a clone of Dogfish Head's 90 Minute IPA.

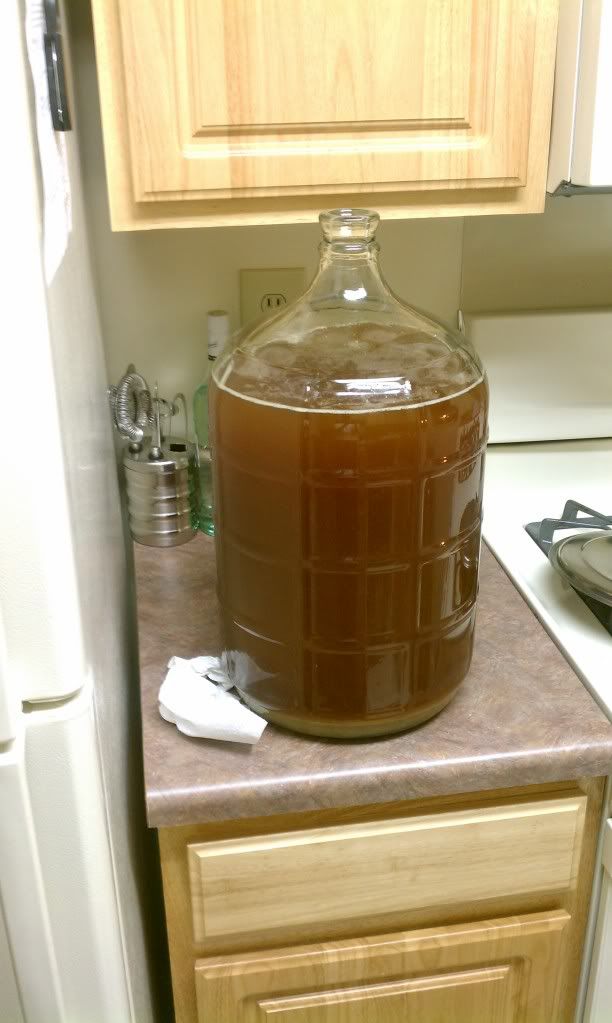
I've been researching all-grain brewing, and I'm starting to plan for some equipment in the near future, but in the meantime, I'm sticking with extract brewing.

06 March 2011

Update

It's been a while since anything notable's happened.  I transferred the Guinness clone to secondary, and added the Jameson/Vanilla mixture.  The finished product smells amazing.  I can only imagine how much better it will be after allowing the flavors to melt together.  I tasted some of the base stout before adding the whiskey, and it tastes identical to Guinness.  The folks at Austin Homebrew really know what they're doing.

21 February 2011

My First DIY

After brewing the Kolsch, I realized that I desperately needed a wort chiller.  After shopping around on homebrew supply websites, I decided that it didn't look too hard, and necessity due to my self-imposed timeline dictated that I go the DIY route, rather than purchasing and waiting for a pre-made chiller to arrive.  $70, a trip to Lowes, and a realization that copper has gotten very expensive later, I had a pretty convincing looking wort chiller in my hands.


Friday I brewed the Guinness draught which will be the base of my Irish Car Bomb Stout, and I put my new tool into action.  I must say, I was very impressed with how quickly I could cool the wort to manageable temperatures.  If I were to guess, I'd say about 5 minutes from when I turned the stove off to when I was pouring the wort into the primary fermenter.


In other news, I had my first experience bottling tonight.  I finally bottled the Kolsch.  It was pretty involved, but after watching some YouTube videos, I pretty painlessly siphoned my beer from secondary into the bottling bucket.  I was three bottles short of two complete cases of 12oz. bottles, but I think for my first 5 gallon batch, netting 540oz. out of a 640oz. brew isn't too terrible I guess.  There were a few withdrawals for hydrometer measurements, and some spillage from both siphoning to secondary, and bottling splashing, which would account for most of the losses.  It tastes pretty good, I'm sure chilled and carbed it'll taste even better, but I'll know that for sure in a fortnight...


Final stats for the Kolsch were as follows:

OG - 1.039
FG - 1.005
ABV - 4.454%
IBUs - 26.68

Meanwhile, the Guinness clone is bubbling away in primary.

16 February 2011

This Stout Will be the Bomb

More specifically, an Irish car bomb.  Hopefully that is.  I found a recipe online for an Irish car bomb stout, but it was pretty advanced.  I have no idea if it would taste right, especially with my limited knowledge.  So I browsed Austin Homebrew's website, and stumbled on a clone recipe for Guinness draught.  Bingo, I had my base for the carbomb stout.  The recipe online called for two whole vanilla beans, sliced in half lengthwise, then halved to be soaked in 1-2 cups of Jameson whiskey all throughout primary fermentation, and to be introduced into the mix for secondary.  Sounded easy enough, so I purchased the ingredient kit, and now it's at my house.


My plans are set for Friday, and the weekend can't get here soon enough.

Here's the recipe as I think I'm going to follow it.  The only difference may be to add a small amount of cocoa powder to the Jameson/vanilla mixture to get more of the chocolate milk flavor from a car bomb, as well as possibly a bit of vanilla extract since I'll only be soaking the beans for a week, as opposed to two weeks per the online recipe.  I'll have to taste it as it moves along to see what I think.


Per my planning, the bottles should be ready to crack open on the day of the Final Four.

08 February 2011

The Big Time

I brewed my first extract beer about a week ago.


It's a Brewers's Best Kolsch, and it's currently in secondary fermentation.  There's a lot of debate around saying that secondary isn't needed anymore, but I went ahead with it.  I wanted to see what all aspects there were to brewing more advanced stuff.  It's a nice color, and seems to be moving along nicely.  There was a significant amount of blowoff at first, and it popped an airlock off of my carboy.  I had to attach a tube to the carboy, rather than the airlock for a few days to keep it under control without spilling all over.


A friend and I are going to attempt to brew an Irish car bomb stout in time for the March Madness final.  It's going to be a clone of Guinness draught, and Jameson and vanilla introduced in the secondary fermentation.  It sounds pretty tasty, and I'm looking forward to it.

24 January 2011

The Fruits of my Labor

Saturday was the day.  I opened and enjoyed my first homebrew.  The Mr. Beer West Coast Pale Ale.

I chilled it in the fridge for an hour or so, and cracked it open at lunch.


It was a clear, fairly well carbonated beer, and the head stuck around for a normal amount of time.  After the first hesitant sip, I was pleasantly surprised.  For a Mr. Beer booster recipe, it was actually pretty good.  A very light, almost fruity beer, I could easily drink a few glasses full at a cookout or something like that.  It's not really the beer you're looking for during the dead of winter, but it's still a good one.

I give this batch 8 glasses out of 10.  It scores high because it's my first batch, and I'm very pleased that it's drinkable, let alone good.  I was wary about investing any more money into this hobby, since I hadn't even tried this batch yet, but after doing so, I'm very glad I did.  I can only imagine how much better my next recipes will taste.

20 January 2011

The Real Deal

As with any new hobby of mine, I can't stop talking about it...  Well, I ran my mouth to the right person the other day.

It turns out that a co-worker of mine used to be into home brewing, and had an entire setup that he was looking to get out of his basement.  He asked if I would be interested in picking it up (at a considerable discount), and I couldn't say no.

A few days later, after he had gotten everything together and ready to go, I paid the man, and we loaded up my car.


It was less than 30 degrees outside, and icy, so I really didn't have too much time to look over my spoils, but later on at home, I could finally sit down and look at what I'd gotten.


I was looking at two 5 gallon carboys, an airlock for each one, a bucket for bottling that was full of all of the equipment I could need.  I had a hydrometer, thermometer, hoses and bottling wands, a carboy cleaner, even a few containers of malt extract he'd never used.  Plus, he had a bottle capper, two 12 bottle cases of 20oz brown glass bottles, and enough bottlecaps for a few batches.  I am now officially set up for serious buisness homebrewing...

13 January 2011

All Bottled Up...

The two weeks that my beer was in fermentation dragged on forever it seemed.  I was spending my free time re-reading "The Joy of Home Brewing", and browsing through internet forums dedicated to the hobby.  I was starting to gather more information on hop varieties, yeasts, and grains than I ever knew existed.  I shopped for carboys, brew kettles, outdoor propane brew heaters (very practical in an apartment complex), hydrometers, and anything I could think of that I'd need.  Meanwhile, I had yet to even bottle my first batch of Mr. Beer...

I planned on bottling on a Sunday, but on Friday night, curiosity got the best of me, and I drew a small amount of beer from the tap on my fermenter.  It smelled, and tasted like flat beer, which was good, because that was what I was holding.  Since I didn't notice any off flavors in my beer, I decided that Saturday would be the new bottle date.

A fresh round of sanitation began in the morning, and again, before I knew it, I now had eight 1 liter bottles of my first pale ale. I stored them in a closet that I had cleaned out, and dedicated to beer storage, and closed the door.  Now phase two of waiting had begun.

I promised myself that I was going to take this hobby slowly, and develop at a manageable pace.  I hadn't even had a cold glass of my beer yet, there was no way that I was going to rush out and get a more advanced setup.  I vowed to brew at least one or two more batches of Mr. Beer before graduating into the next world of homebrewing...  Right...  Let's see if that works out.

The Morning After...

26 December started off easily enough, but I couldn't take it anymore.  Less than 48 hours after unwrapping Mr. Beer, I had to start brewing...

My girlfriend and I proceeded to spend the next hour or two cramped in my kitchen, trying to get the first brew underway.  My basic kit came with a West coast pale ale, enough extract and booster to make 8.5 US quarts of beer.  I carefully read, and re-read all of the directions (a huge milestone for a guy), and with great care, sanitized all of the equipment I was going to use.  Dissolved the booster in water, boiled, added the hopped malt extract, and added the wort to the cold water in my keg already.  I stirred, let the mixture settle in temperature, then pitched the yeast.  The whole process was probably only 60 minutes, but it felt like much less.  Before I knew it, the yeast was mixed in with the beer mixture, and I was ready to hurry up and wait.  I left the beer to ferment in the keg for two weeks, and on 9 January, I was ready to bottle.

And so it begins...

Oddly enough, I had the biggest present under the Christmas tree at my girlfriend's house this year.  I had been looking it over for a few weeks, trying to figure out what it was, but then on Christmas morning, I unwrapped what could be the start of a new hobby (read: obsession).  I had, in my hands, a Mr. Beer homebrewing kit.

Over the past three years, since turning 21, I have been religiously trying and loving new beers.  All in all, I've easily downed over 150 different bottles, cans, and draught pints.  Seasonals, IPAs, pilseners, ales, lagers, wheat beers, and my personal favorite, stouts.  I've read as much about the different kinds of beers as I cared to, trying to find out what made them taste the way they did, and how I could notice differences between two lagers, or ales.  Overall, I found some beers that I enjoyed (most of them), and a few that I most certainly did not.  I was always left wanting just a little bit more though...  This Brazilian Xingu would be better if it were just a tad less sweet.  Thailand's Singha is good, it just needs a little something to make it unforgettable etc.

Wherever there lies a problem, a solution exists, and I had one; I can just brew my own beer.  It wasn't until I tore into my Mr. Beer box that I realized how easy it seemed.  Sanitize your equipment, mix some powder and water, boil, and voila!  Beer!  This rudimentary kit does indeed make beer, but I was already intrigued, and was wondering what exactly was in the powder and extracts I was mixing together?  What steps had been taken already that were beyond my control in making my perfect beer?

Curling up with Charlie Papazian's "The Complete Joy of Home Brewing" immediately cast light on what exactly was happening in my sealed fermenter in my kitchen, and I was already beginning to formulate my master plan on how to zero in on that perfect pint.